Category Archives: desserts

Newness and Gingerbread Cookies

paper

New Year. New you? New resolutions? New beginnings? What is it that makes us so fond of newness? Newness is inherent. It is our very nature. Must we wait ‘til some arbitrary moment on a calendar to feel the newness of ourselves? Why no, for we are new in every moment. Each one now is not the same as the one just passed and you need not await the timing set by another to embrace alternative perspectives, take on dream-worthy challenges, experience life differently.

Life, as nature, has a rhythm. Allow yourself to feel your own rhythm and when you are ready to grow to move to fly, it might not be the new-year, it might not even be Spring. It may be the coldest depths of winter when that creative urge begins to stir within you. Heed that call. Dance to the tune of your inner calendar. It’s the only one that will guide you home. It’s the only one that will tell you just how old you are; whether it’s time to settle down or power forth with that creative vision you’ve submerged for so long.

For too long we have danced to the tune of common causes. Be it new year festivities or valentines day roses; be it the arduous mill of the corporate grind or the greasy rung of the mortgage ladder, be it legalizing love into the defined parameters of what society calls marriage or acquiring false security through such unreal notions as money.

Stop.

Go eat that sugar filled jam doughnut if you want to, even if it is the 2nd of January. Go hug a colleague even if every fibre in your fearful body tells you that it is entirely socially unacceptable. Go destroy a project you’ve been trying to complete with all guts and no heart. Whatever your tune is, sing it.

It is not a ‘new year’ for newness is all there is.  Enjoy celebrating this year, this day, this moment. Now.

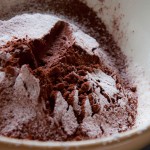
I’ll leave you with this recipe for spelt gingerbread cookies. I’ve never cooked with spelt before :)

Spelt Gingerbread Cookies (adapted from www.mynewroots.org)

Ingredients: (makes 15 cookies)

350g whole spelt flour
¼ tsp. sea salt
½ tsp. baking powder
1 tbsp. ground ginger
1 ½ tsp ground cinnamon
½ tsp ground cloves
½ tsp freshly grated nutmeg
5 tbsp. coconut oil
70g dark brown muscavado sugar
½ cup date syrup
3 tbsp. unsweetened applesauce
1 tsp. vanilla extract

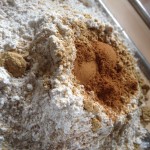
Sift the dry ingredients together.

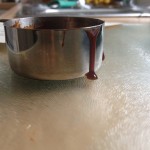
Melt the coconut oil and mix in the date syrup, applesauce, and vanilla.

Pour the wet ingredients over the dry, and fold until it just comes together into a dough. Roll into a ball and wrap it into a plastic wrap and refrigerate for an hour.

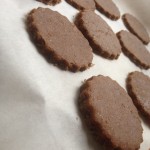
Preheat oven to 350°F / 175°C. Remove dough from the fridge, unwrap and place the dough between two pieces of baking paper and roll out to about 2mm thick. (I needed to lean into this quite hard). Remove top half of the paper and cut out desired shapes. Gently place on a lined baking sheet.

Place cookie sheet in the oven and bake for 7-10 minutes (depending on how chewy you like your cookies). Remove from oven and let cool… if you can resist!

Oops I did it again

I agreed to make another wedding cake. ‘Agree’ is putting it mildly. The agreement was infused with enthusiasm and love and excitement and the conversation culminated in me saying that I would be honoured to make Renzo and Elsa’s wedding cake.

And then I realised that the wedding was a day before Emma’s birthday (Emma without whom I could not have pulled off my previous cake effort). So I proposed the following: “Emma, why don’t we just cancel your birthday dinner, you instead spend your birthday helping me make this cake and then we’ll somehow transport it to Berkshire”. Obviously she agreed. LOVE HER.

Since then we’ve been sketching ideas and buying tins n cutters n cute things and we went to a decorating course - where we made this.

tiered cake

No recipe attached as we didn’t actually bake, we spent the day at RockBakehouse learning new decorating techniques .

It was fun and tiring and so so rewarding to be creatively engaged.

Carrying the cake home on commuter trains was, um, interesting. And then I decided it would be an awesome idea to carry the cake all the way up to Leicester.

Time to get baking!

3 ways with apples

Lets continue with the three-ways theme shall we?

applebowl_0033

This week I have been harvesting (and by harvesting I mean picking up the fallen apples from the tree as I come home from work) all the apples from the tree in my garden (yes I’m lucky enough to have a garden, for now). So many apples and only so many apple pies one can eat (ahem).

Since Christmas is just around the corner (don’t worry you too can bury your sweet ostrich head back in the sand as soon as you’ve read this post), I figured some apple chutney stored in jars and ready to give away as gifts wouldn’t be such a bad thing.

Next I made a paleo vegan gluten free sugar free apple pie, and then some sugary buttery apple cookies. My diet, as my life, may be full of apparent conflicts and contradictions but in the end it always boils down to the maximisation of pleasure…

Roasted garlic and apple chutney

(recipe adaptation from Abel and Cole)

1.5kg apples, peeled cored and roughly chopped
1 whole bulb garlic
3 large onions, peeled, chopped into chunks
2 handfuls raisins
1 mug organic apple cider vinegar
1 tsp ground coriander
1 tsp mixed spice
1 tsp salt
1/2 mug brown sugar

Pre-heat the oven to 190C.  Slice the top off the garlic bulb so that you can just see the flesh of the garlic cloves through the skin. Put into the oven and leave to roast for 40mins.

In the meantime put all of the remaining ingredients into a large saucepan and bring to the boil. Stir and bring down to a simmer.

Once the garlic is roasted, squeeze the bulbs out of the skin and into the saucepan.  Continue to let the chutney simmer for about 1.5 hours until it reaches a thick porridge-like consistency.

Cool and spoon into sterilised jars, saving for Christmas!

apples_0015

Apple pie (paleo-vegan)

For the crust:
300g raw cashews
200g pitted dates
140g brown rice flour
40g gluten free oats
2-8 tbsp water
1 tsp vanilla extract
a pinch of malden salt

For the filling
4 apples
200g pitted dates
juice from ½ lemon
1 tsp vanilla essence
1 tsp cardamom
1 tsp cloves
Pre-heat oven to 200C.

Make crust: place all the dry ingredients into a food processor and pulse until you have a fine flour. Transfer to a large mixing bowl and set aside. Place the dates, vanilla nd 2 tbsp of water in the processor and run until you have a complete smooth a creamy mixture. Scrape down the sides and add more water if necessary. Scoop this into the bowl with the dry ingredients and mx together using your hands. The dough should eventually be firm enough to form into a ball.

Split the dough ball into two. Roll one half out and press it down into a pie pan lined with parchment paper. Prick the crust and place in the oven to pre-bake for ten minutes.

piebase_0051

Make filling: slice apples into wedges. Blend dates, lemon, vanilla and spices in the processor. Mix in with the apples. Press the mixture into the pre-baked crust.

Roll out the other half of the dough and place over the pie dish. Press the edges down and cut four slits in the centre of the pie.

Bake for 30-40mins until the crust has browned a deep golden.

pie_0060

Apple Cookies

40g softened butter
130g light brown sugar
3 medium apples, peeled, cored and grated
1 egg
1 tsp vanilla
125g wholewheat organic flour
2 tsp baking powder
1 tsp cinnamon
½ tsp salt
handful of nuts (walnuts or pecans)
2 tbsp brown sugar
1 tsp cinnamon

Yields 10 cookies, if you don’t eat the mixture.

Set the oven to 350F.

Cream the sugar and butter. Next mix in the egg and then the grated apple and the vanilla. Don’t eat the raw mixture.

In a separate bowl mix together the flour, cinnamon, salt. Add the dry ingredients to the wet ones and mix together. Fold in the nuts. Don’t eat the raw mixture.

cookiebatter_0007

Dollop about a tablespoon of cookie batter onto a baking tray lined with parchment paper leaving at least an inch of space in between the cookies. Cook for 15-20 mins until the cookies are golden across the top.

As soon as they emerge from the oven, sprinkle some more brown sugar and cinnamon mix across the top.

appletree_0024

Project Wedding Cake - success!

I am posting this amidst the Sunday morning soporific effect of post-wedding success. Accomplishments so far today: hauled self out of bed. Picked blackberries and apples from the garden and eaten copious amounts of both.

I don’t suppose you want to hear about yet more buttercream; lord knows I don’t. I have recently made enough of it to fuel an entire village of people for a month. Yet, having been elbow deep in vast quantities of butter and sugar for what seems like an eternity, the keyboard is a welcome respite from the perils of kitchen spoon-licking. So, you’re going to hear about the project. Again. Lucky you.

Did I mention that I had roped Emma (and her wonderful kitchenaid) into project wedding cake? I had. So Thursday evening at the office we were both itching to get going. Part excitement because we are the kind of people who get excited about fooling around with ingredients and kitchen tools, and part nervousness about the magnitude of the cake task that lay ahead – the making of it and the transporting of it to the wedding venue. I was already somewhat wary following Emma’s stern warnings “there will be no licking of the buttercream bowls”. I’ll say no more about that.

The entire evening, we weighed, measured, sieved, levelled, softened, heated, whisked, whipped, dowelled, chilled, coated, piped, and panicked (only slightly… okay a lot, but wouldn’t you if the cake suddenly started sliding en-route and was about to fall into the driver’s lap?!). In all honesty the transportation of 10kgs of decorated wedding cake was the most stressful part of the evening. The rest was a lot of fun. My personal favourite was the 2kgs of icing sugar forming a haze of sweet white cloud across the kitchen surfaces and in the air such that we were at one point inhaling sugar. I may as well have been in heaven.

From the heights of sugar heaven into the depths of the venue’s beer cellars is where we ended up; covering up the hand-prints in the side of the cake (a result of my having saved it from splattered oblivion whilst driving along the A214 towards Chelsea). At 10:30pm we left the cake sitting comfortably in the coolness of the cellars at the wedding venue exhausted but fuelled by the thrill of feeling proud, surprised and relieved.

The penultimate part of the project was excusing myself from bridesmaid duties to run to the venue to add the fresh flowers onto the cake. The flowers were an exact match of the bride’s bouquet. Great. The flowers were arranged in a manner that I did not know how to decorate a cake with them. Not so great. (Heck I have never decorated a cake with flowers, what am I talking about?). I ended up dismantling the arrangement (sorry, dear florist) and doing what I do best: making it up. It worked. I think.

The real judges were the wedding guests. And so came the final part of the project: the cutting and serving of the cake. It was a success. When people began asking me whether cake making was my profession, I knew my job was one well done. Thank you Pauline for trusting me with your wedding cake. Thank you Emma for helping me with the project whilst allowing me to take full credit.

For now I think I’ll stick with writing….


Buttercream baby, let’s talk

It’s getting creamy in here. And not in a good way. Let’s re-cap: yesterday we spoke flour, butter and sugar. I finally faced the challenging truth that I am in fact, baking a wedding cake and that despite my numerous attempts at denial, the magnitude of the project was beginning to dawn on me.

I did say that today I was going trial a different cake. I didn’t. Even my own very persistent inner perfectionist fatigued itself this weekend. In the end (the end being around 2am), I decided that the chocolate cake was delicious and also intense enough to hold the sweetness of the white chocolate filling. I will work out how to use the dowels next weekend. For now, let’s focus on making everything look pretty.

So today we’re speaking sugar, butter and white chocolate as we face filling, frosting and piping.

For the filling I have decided to go with a classic recipe for white chocolate buttercream and fold frozen raspberries into the mix - which will look beautiful when the cake is sliced. The recipe and the process proved easy. This one is a winner.

For the frosting I’m going with a recipe from Smitten Kitchen. In the end I decided that Swiss buttercream would be more forgiving as a frosting than any other cover and I needed something not too sweet. I took the advice of several bakers; whipped, whipped and kept on whipping right through my panic until the mix resembled something like frosting. It was a magical moment when it did.

For the piping and decoration I am keeping it simple. I will admit on this blog that I haven’t so much as touched a piping bag before (did I mention I googled ‘how to attach piping nozzle to bag’?). I’ll say no more.

So a whole three days into my long weekend I now have an enormous 10 inch, 5kg cake in the refrigerator that I will need to carry on my commute in the morning. I hope my colleagues are hungry. Forget weight training at the gym tomorrow, I’ll just run on the treadmill for hours ‘til I burn off the calories of sugar that I did (not) eat.

Recipes (and lessons learned) below.

White Chocolate Raspberry Buttercream Filling

I took a classic recipe for white chocolate buttercream from Good Housekeeping magazine. It’s a very sweet recipe and ought to offset the density of the chocolate cake.

The quantities provided below covered ½ cm layer of a 10inch cake. I intend to double or triple for the actual event.

Ingredients
175g white chocolate
250g unsalted butter, softened
500g icing sugar
3 tbsp milk
handful frozen raspberries

1. Melt the white chocolate in a heatproof bowl set over pan of simmering water. Remove when smooth, and set aside to cool for ten minutes.

2. Put the softened butter into a large bowl and sift over the icing sugar. Starting slowly, beat together until fluffy and combined. Beat in cooled white chocolate and milk.

3. Set aside and fold in the frozen raspberries when ready to use.

Swiss Buttercream

Recipe from Smitten Kitchen/ Wedding Cake Genius

Ingredients (to cover a 10inch cake)
227g caster sugar
4 large egg whites
340g butter, softened
1 tsp vanilla extract

1. Whisk egg whites and sugar in a large metal bowl over a pot of simmering water until you can no longer feel sugar the granules when you rub the mixture between your fingers.

2. Transfer to the mixer and whip until it turns white and approximately doubles in size. Add the vanilla.

3. Finally, add the butter a little at a time and whip, whip, whip. Here I quote Smitten Kitchen “do not have a panic attack as this takes a while to come together”.

So. Lessons learned:

Decorating the cakes is easier when they are frozen or very cold.

Moving the cakes from one surface to another is not easy whichever way you look at it. I have yet to address the problem of how I am going to transport them from my home to the venue (and whether assembly of tiers should take place here or on site). Any volunteers?

Make way more white chocolate buttercream filling and Swiss buttercream frosting than anticipated (note this is most definitely not because I ate some (a lot) along the way).

Don’t panic.

I do…

…. Wish I were not freaking out about making my friend’s wedding cake.

No, that was not a typo and yes I am making a wedding cake. Like, a real one. Yeah.

I hadn’t shared that small piece of (big-deal) information here on this blog space in the secret hope that if I kept quiet it would either a) go away or b) the cake fairy might visit. Much like my other commitments in life, it didn’t go away. And the cake fairies are nowhere to be seen.

So I hereby declare this relationship with cake baking, official. And, we’ve had our first fight already. I won’t lie. It got pretty messy. My shirt is covered in more flour, butter and chocolate than my kitchen floor, my sink is piled with more dishes than I can see over the top of, and the number of expletives I’ve uttered means that my mouth needs cleaning even more than the kitchen sink.

And so far all we have is one very imperfect ten inch dense round chocolate cake base. Let’s not even talk about white chocolate raspberry buttercream filling and the oh-so-trivial issue of making perfect Swiss buttercream frosting and using cooking tools hitherto unheard of on this blog. Dare I say I am actually embarrassed that for someone who professes some degree of prowess in the kitchen, my baking skills are leaving much to be desired.

So. What else was there to do but to retreat here, to this space (with a spoonful of raw chocolate mix in my hand. Eating my emotions? Me? Never…..).

Pauline. If you are reading this, do not worry. I have an entire week to calm myself down and talk myself up to trial round two. You shall not have a cakeless wedding. It will be fine. I promise. I do.

Gulp.

Here is the the one I’ve trialled. Am attempting another one this afternoon and will report back. I promise not to eat raw cake mix (much).

Dense Chocolate Cake (recipe from Good Housekeeping, for one 10inch cake)

350g butter, chopped
350g dark chocolate
275ml milk
375g plain flour
3 tsp baking powder
60g cocoa powder
750g caster sugar
6 medium eggs
250ml sour cream

1. Pre-heat oven to 160C (140C fan) mark3. Grease and line a 10inch round cake tin. Put butter, chocolate and milk into a pan and gently melt until smooth and glossy. Set aside to cool slightly.

2. Meanwhile sift the flour, baking powder and cocoa into a bowl and stir in sugar. In a separate jug mix together the eggs and sour cream. Pour both the chocolate and egg mixtures into the flour bowl and whisk until well combined.

3. Pour cake mixture into the prepared tin and bake in the centre of the oven for about 2 hours or until a skewer comes out clean. Allow to cool completely in the tin.

[note, when I did this, I hadn't used wet strips and so the cake needs levelling in order to use it for my layers. also, the core is still slightly fudgey; use a heating core? still contemplating this]….


Shortlisted!

This calls for cake.

Some weeks ago a friend of mine drew my attention to the Taste Master job and said “this has your name all over it”. The widely advertised ‘Best Jobs in the World’ promotion by Tourism Australia was certainly creating some buzz.

When I finally got around to putting my always opining, often unhelpful, rational mind to one side, my heart had a chance to be heard; and, to agree with my friend. And so, I submitted an entry.

Late last night, just before my head hit the pillow, I checked my iPhone for new email messages. To receive the ‘ping’ of e-communication highlighting that 600,000 applicants had submitted entries for the World’s Best Job and that I had made the top 25 shortlist was surreal to say the least. It still is… my heart is peering smugly up at my disbelieving head. It is however, true. I’m on the shortlist. Woop!

Oh, yes. Cake. I wouldn’t leave you without something scrumptious to eat… let there be cake!

Carrot Cake

Ingredients

250g soft brown sugar
120ml vegetable oil
250g ground almonds
250g grated carrots
3 eggs

Method

1. Preheat oven to 180C and line a 20cm cake tin with baking paper.

2. Mix together the sugar and oil, then add the eggs one at a time, mixing to combine. Stir in the almond flour and the carrots.

3. Pour the mixture into the cake tin and bake for 50mins to 1hour until the top has turned golden brown and is firm to touch.

 And let’s not pretend I didn’t eat it straight from the oven tray. I totally did.

Hazelnut Chocolate Tart (Gluten Free)

Going to the gym on a bad knee wasn’t the smartest of ideas. One might even argue that the twitching pain of a twisted knee is somewhat deserved. Ouch. Do we not do it so often? Push our bodies through gruelling regimes; be it overexertion, overeating, toxic makeup or the unnatural position of sitting at a desk for ten hours a day (I have admittedly been guilty of all of the above).

So this paleo vegan chocolate tart inspired by Gourmande in the Kitchen then, was a little gift of appreciation for my overworked, under-rested body. A thank you, to the vessel that carries me through this experience we call life.

Hazelnut Chocolate Tart (Gluten-Free, Paleo, Vegan)

(adapted from Gourmand in the kitchen)

Ingredients

For the tart crust
40g unsweetened shredded coconut
200g ground almonds
30g coconut oil
1/4 tsp salt
30 g maple syrup
For the chocolate ganache
240ml full fat coconut milk
280g bittersweet chocolate, finely chopped
1 tsp vanilla extract
For the Topping
40g hazelnuts, chopped
10g ground or shredded coconut
Pinch of sea salt

Instructions

Preheat oven to 350 degrees. In a food processor, pulse together almond flour, salt and shredded coconut. Melt together coconut oil and maple syrup and add to almond and coconut mixture, pulse until coarse crumbs form. Transfer the dough to a greased tart pan or baking dish (preferably one with a removable bottom or you can just use a sheet of baking paper beneath the mixture instead). Evenly press dough in bottom and up sides of pan. Bake in center of oven until golden and firm, about 10-15 minutes. Transfer to a wire rack to cool completely.

Place chopped chocolate in a large mixing bowl. In a small saucepan, bring coconut milk to a boil. Pour the hot coconut milk over chocolate, then slowly stir until smooth and creamy. Mix in vanilla extract.

Pour chocolate mixture into cooled tart shell. Lightly sprinkle hazelnuts coconut across the top. Add a pinch of flaky sea salt if desired. Chill for 40-50mins until set and serve (with a small prayer of gratitude to your body) :)

Buckwheat Pancakes

I have not been in the blog space for what seems like an eternity (an eternity being the about the whole of a week). So much has been happening since last weekend (everything from arguing that despite the mild embarrassment of frequently being ID’d for alcoholic purchases, I did not in fact submit an erroneous business birthdate of 1959; to eating my bodyweight in emotional salted-caramel-chocolate-coated-peanuts; to taking several hours and five trains to get home on Thursday evening; to going full steam with my body daily, on a battery recharge of about four hours nightly). It’s been a long and gruelling, but altogether rewarding week.

But. Less of that, and more of the important stuff. Blueberry buckwheat pancakes. Priorities, right?

I have been searching for a great buckwheat pancake recipe for some time, and there are many many variations out there. Ultimately, although they may exist, I never found one that was 100% buckwheat in form. And so, I got to work inventing one that worked. I used Molly Wizenburg‘s recipe as a starting point, based on her admirable dedication to finding good pancakes.

Recipe: Blueberry Buckwheat Pancakes

Ingredients:

150g buckwheat flour
3 tsp sugar or xylitol
1/2 tsp baking powder
180ml buttermilk
70ml milk
1 large egg, yolk and white separated
1 tbsp coconut oil
maple syrup and fresh blueberries for serving (optional)

Method:

1. Mix together the fry ingredients; buckwheat flour, sugar, salt and baking powder.

2. Pour the buttermilk and milk into a bowl or large measuring jug. Whisk the egg white into this milk mixture.

In a small bowl, beat the egg yolk with the melted butter. Whisk the yolk mixture into the milk mixture.

3. Pour the wet ingredients into the dry ingredients and whisk until just combined, the batter will be thick

4. Heat a large nonstick nonstick frying pan over medium-high heat. Add a little of the coconut oil and heat until melted.

5. Ladle about a tablespoon of batter into the pan, adding another 2-3, providing they are not crowded. After one minute, add fruit, if desired, fresh blueberries work a real treat. When the undersides of the pancakes are nicely browned and you see the top begin to bubble, its time to flip them. Cook until the second side has browned.

6. Set aside on a warm plate and repeat with the remaining batter. Serve warm with maple syrup.

Brown Butter Sweet Macaroni

Yep, published in the Guardian today, my own recipe of Brown Butter Sweet Macaroni.

I’m kind of chuffed considering I have always extolled the virtues of sweet pasta (sugars and carbs, a marriage of two divinely inspired ingredients, making love bubbles in my tummy). I must find time to tell you about the chocolate pasta recipe soon too. Oh, and the sweet penne. For now though, here is the macaroni….

Recipe: Brown Butter Sweet Macaroni

Ingredients:
1 cup macaroni (I used fresh, but dried works too)
3 tsp ghee/clarified butter
1/3 cup sugar
1/2 cup milk (full fat works best)
1 stick cinnamon
3 cloves cardamom
1/4 cup cashew nuts (or sliced almonds or pistachios as you prefer)
1/4 cup raisins

Method:

Par boil the macaroni (I used fresh pasta so boiled for 1min. If using dried pasta, boil for 3-4). Drain, and leave aside.

In the meantime, over a medium heat, melt the ghee in a pan. Add the cardamom, cinnamon and cashews. Cook for a few minutes until the cashews start to brown. Spoon out of the pan, discarding the cardamom and cinnamon, saving the cashews on a plate for later.

The ghee will have turned brown, with a beautiful nutty aroma. Whilst the ghee is still hot, add the macaroni to the pan and cook for 3 minutes until it starts to brown.

Add the milk and allow to simmer. When the milk has reduced by half, add the sugar, raisins and cashews. Continue to simmer until the milk has reduced completely.

Serve immediately.